

Post by AlanB on Apr 10, 2006 6:14:32 GMT -5
Parachute Damsel Fly.
Start with a standard medium wire hook about #10 or #12. You shouldn't use a long shank as most of the dressing will be hanging off the back and you might as well have better (stronger hook) than a load of hook shank with no dressing on it.
I'm going to dress a male damsel because I don’t have the right colours at hand for a female (i.e. blue)
For the body I am going to use furled Antron yarn. Any make will do. To make the body cut a length of about 4 inches of yarn and tie one end to the hook shank. Attach your hackle pliers to the other end and give them a spin.

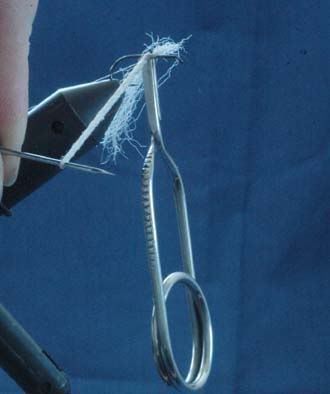
Once the yarn is well twisted up place your bodkin half way along the yarn and fold it around the bodkin. Attach the other end of the yarn to the hook shank. Now remove your bodkin. The yarn will twist around itself, this will be the body. You may need to encourage this to happen.
img.photobucket.com/albums/v203/AlanBithell/Para%20Damsel/Dams3.jpg
Remove the yarn from the hook shank, it may help to hold the open end of the body in your hackle pliers.

You will have noticed that I have used white yarn. Once attached to the fly I will colour it olive. You may find it easier to do this especially for the blue bodied flies.
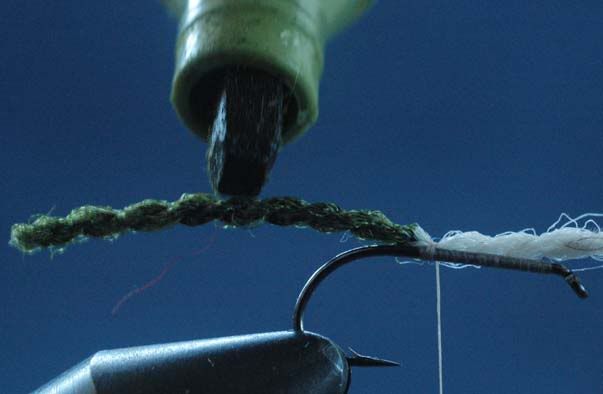
This also gives you another advantage. You can use the front end of the body as the parachute post.
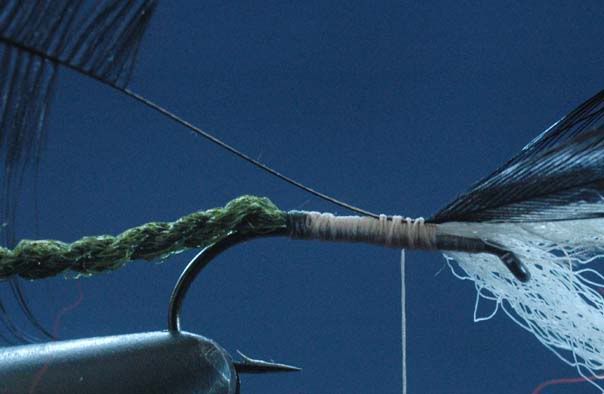
Now to fix the wings. Here I have used black hackle points but you can use any colour you like. Prepare by stripping off the hackle fibres leaving you with just the wings and a good working length of stalk. Tie the hackle tips in as a pair with the convex sides together on edge on top of the hook shank.
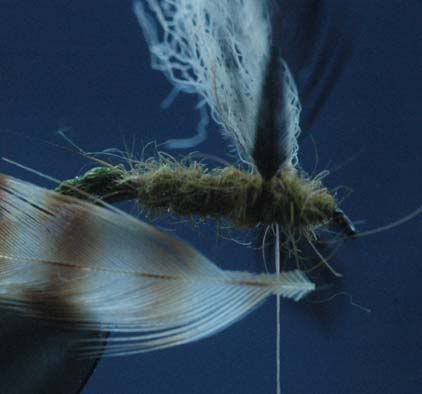
Split them by pulling the stalks between the hackle tips and tying down. Return the thread to the body tie in point and apply olive dubbing to the thread
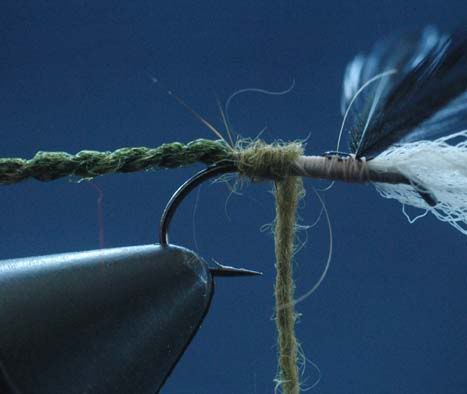
Dub to the parachute post (the front of the body). Then take the dubbed thread to the eye in one open turn.

Then wind back to the parachute post holding the post up to set it in position. Finish with the thread at the hook bend side of the parachute post.

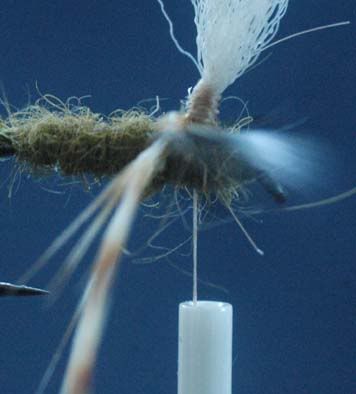
Wind the thread around the parachute post to create a base for the hackle. This is not easy but with practise it becomes easier.
Prepare your chosen hackle as shown. You will notice that the top of the hackle has been trimmed longer than the bottom. This is deliberate. The stripped section shown on top lies against the post for the fires half turn and helps stop the hackle from twisting. Tie the hackle to the post with the tip of the hackle pointing straight down.
Lift the hackle and wind around the post. Three turns of hackle should do it, each going below the previous turn. Tie off the hackle to the post below the parachute.
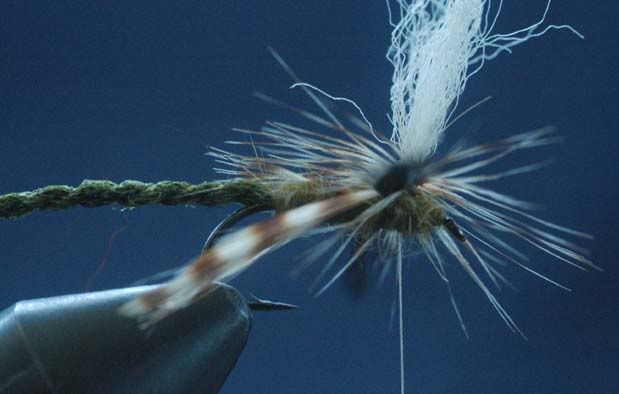
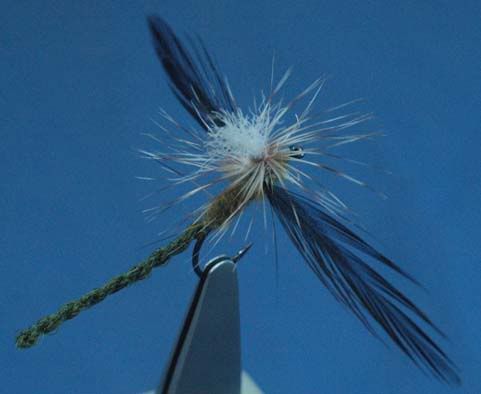
Whip finish around the wing post below the hackle. Trim out the thread and hackle tip then trim the wing post to size.
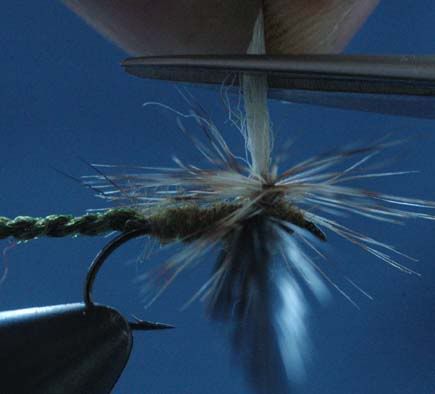
The finished fly with a little trimming of wayward fibres.
Start with a standard medium wire hook about #10 or #12. You shouldn't use a long shank as most of the dressing will be hanging off the back and you might as well have better (stronger hook) than a load of hook shank with no dressing on it.
I'm going to dress a male damsel because I don’t have the right colours at hand for a female (i.e. blue)
For the body I am going to use furled Antron yarn. Any make will do. To make the body cut a length of about 4 inches of yarn and tie one end to the hook shank. Attach your hackle pliers to the other end and give them a spin.
Once the yarn is well twisted up place your bodkin half way along the yarn and fold it around the bodkin. Attach the other end of the yarn to the hook shank. Now remove your bodkin. The yarn will twist around itself, this will be the body. You may need to encourage this to happen.
img.photobucket.com/albums/v203/AlanBithell/Para%20Damsel/Dams3.jpg
Remove the yarn from the hook shank, it may help to hold the open end of the body in your hackle pliers.
You will have noticed that I have used white yarn. Once attached to the fly I will colour it olive. You may find it easier to do this especially for the blue bodied flies.
This also gives you another advantage. You can use the front end of the body as the parachute post.
Now to fix the wings. Here I have used black hackle points but you can use any colour you like. Prepare by stripping off the hackle fibres leaving you with just the wings and a good working length of stalk. Tie the hackle tips in as a pair with the convex sides together on edge on top of the hook shank.
Split them by pulling the stalks between the hackle tips and tying down. Return the thread to the body tie in point and apply olive dubbing to the thread
Dub to the parachute post (the front of the body). Then take the dubbed thread to the eye in one open turn.
Then wind back to the parachute post holding the post up to set it in position. Finish with the thread at the hook bend side of the parachute post.
Wind the thread around the parachute post to create a base for the hackle. This is not easy but with practise it becomes easier.
Prepare your chosen hackle as shown. You will notice that the top of the hackle has been trimmed longer than the bottom. This is deliberate. The stripped section shown on top lies against the post for the fires half turn and helps stop the hackle from twisting. Tie the hackle to the post with the tip of the hackle pointing straight down.
Lift the hackle and wind around the post. Three turns of hackle should do it, each going below the previous turn. Tie off the hackle to the post below the parachute.
Whip finish around the wing post below the hackle. Trim out the thread and hackle tip then trim the wing post to size.
The finished fly with a little trimming of wayward fibres.
Cheers,
Alan.
